How to install the macOS Monterey public beta
Get your hands on all the new macOS Monterey features before the general release this fall by installing the public beta now.
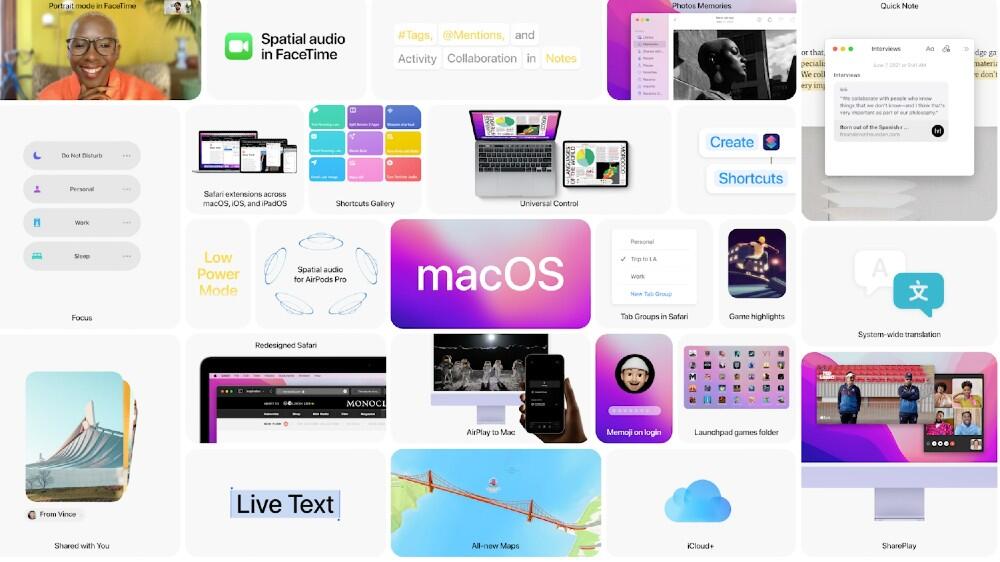
Get your hands on all the new macOS Monterey features before the general release this fall by installing the public beta now.

Image: Apple
We've hit the one-month post-WWDC 2021 mark, and in that time each and every Apple operating system has had its public beta released. For Apple device owners and developers unafraid of bugs and incomplete features it's a great time of the year: All the new software is out before its general release.
Those looking to try the latest version 12 of macOS, also known as Monterey, can install it in just a few easy steps and about an hour of waiting for the 11.73GB download to complete. A word to the wise: If there's anything on your Mac that you don't want to lose in case the update goes bad be sure to enable iCloud backup and ensure that important folders are included. It's also not a bad idea to do a full Time Machine backup so you have a restore point to go back to in case something goes seriously wrong.
SEE: Research: Video conferencing tools and cloud-based solutions dominate digital workspaces; VPN and VDI less popular with SMBs (TechRepublic Premium)
The last prerequisite to cover is whether or not your Mac is compatible with macOS Monterey. If you want to install it you'll need one of the following devices:
- MacBook Pro (2016 or newer);
- MacBook (2016 or newer);
- MacBook Air (2018 or newer);
- iMac (2017 and later);
- iMac (5K Retina 27-inch, released in late 2015);
- iMac Pro;
- Mac mini (2018 or newer);
- Mac Pro (2019).
If you're unsure which model your Mac is, follow the steps on Apple's model identification page to determine it. macOS Monterey is also available for several models of iPad:
- iPad Pro;
- iPad Air (3rd generation or newer);
- iPad (6th generation or newer);
- iPad mini (5th generation or newer).
How to install the macOS Monterey public beta on a Mac
Once you've taken care of all the prerequisites it's time to get to installing the beta. Start by navigating to the Apple Beta Software Program website on the device you want to update. Once there, scroll down until you see the screen shown in Figure A, where you'll see options to sign up for the beta program if you've never participated, or a space to log in if you have. Choose whichever is relevant, follow the onscreen steps, and you'll end up logged in to the program. Figure A: Logging in to the Apple Beta Software Program website.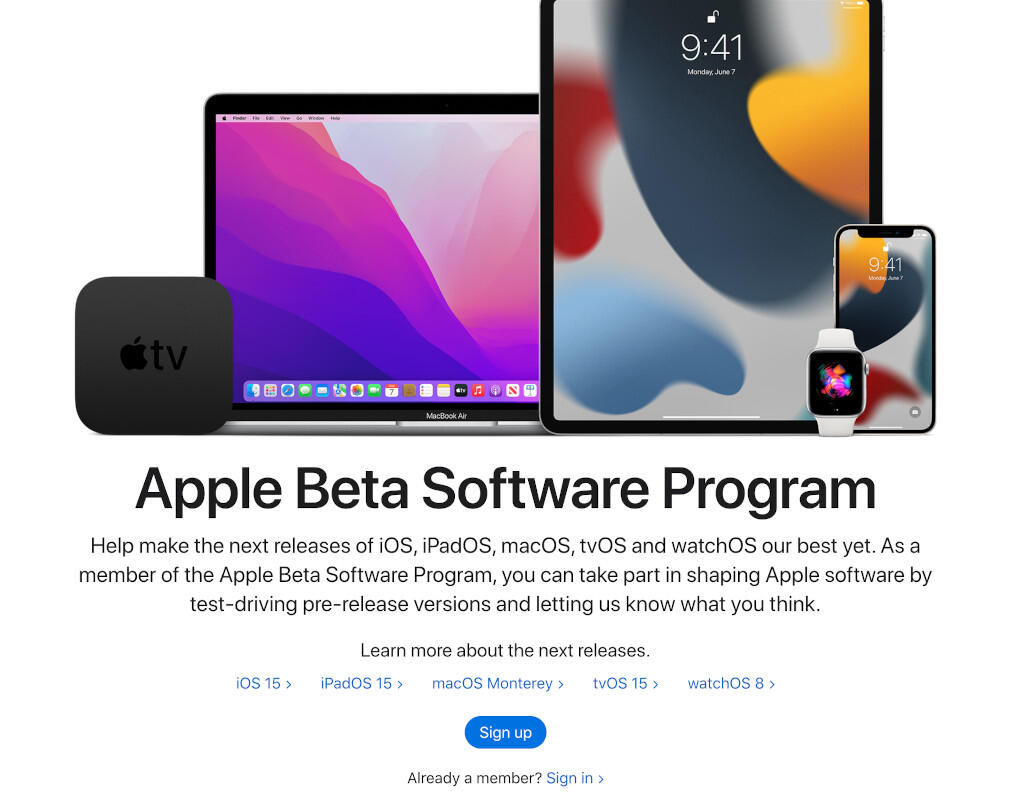
When you're logged in the website should automatically drop you on the page relevant to the Apple device you're on, in this case for macOS Monterey. Scroll down until you see Get Started, where there should be some blue text saying "enroll your Mac." Click that (Figure B). Figure B: Enrolling your Mac in the Apple Software Beta Program.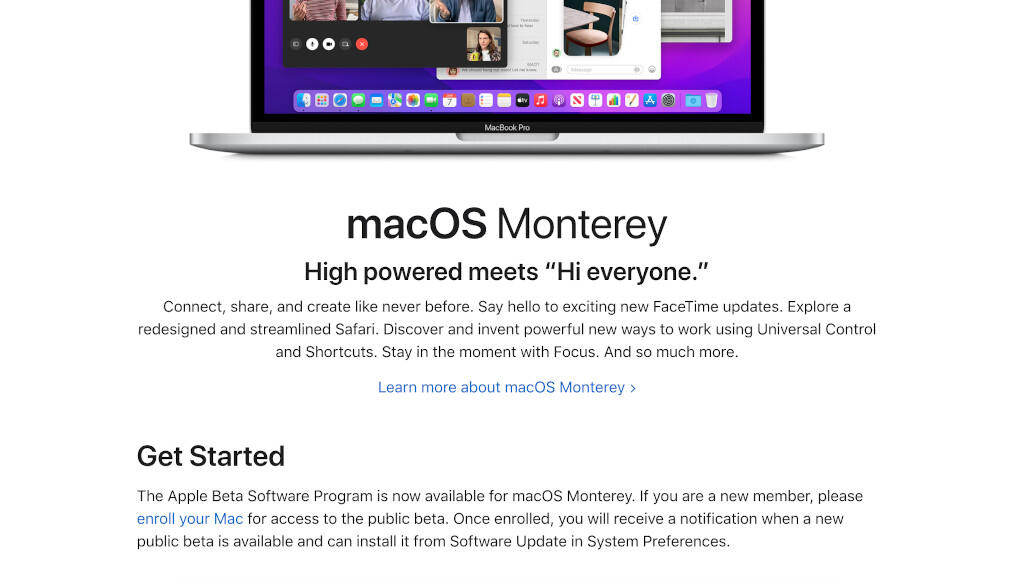
The next screen will have a repeat of some of the instructions above (backup your Mac, etc.), and scrolling down you'll find Step 2: Enroll Your Mac (Figure C). Here you'll want to click on the blue button labeled Download the macOS Public Beta Access Utility, which will download a small .PKG file. Figure C: Downloading the Public Beta Access Utility.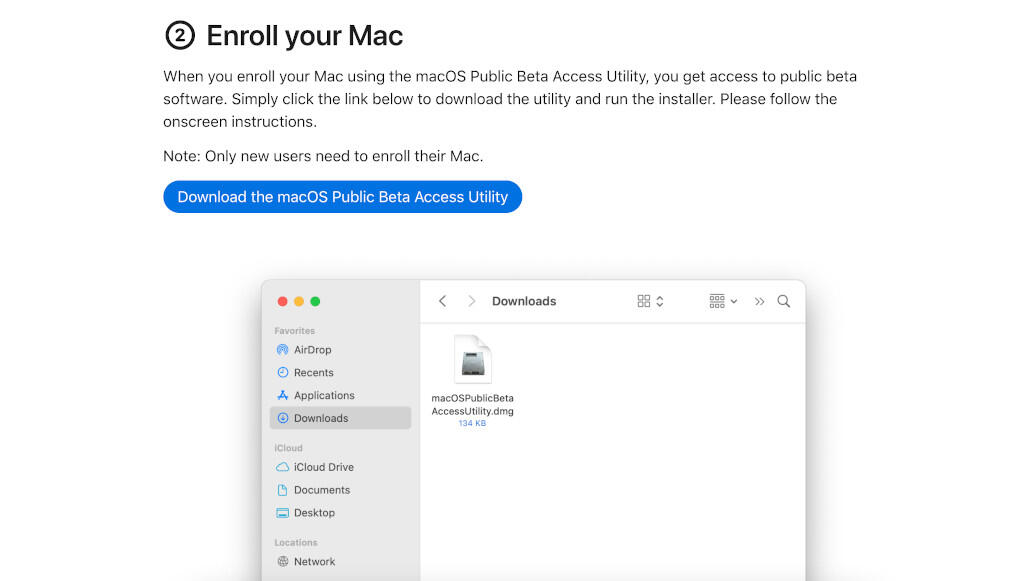
Opening and running the Access Utility will enroll your Mac in the beta program and should automatically open the Software Update window, as shown in Figure D. Click on Upgrade Now, then sit back and wait: As mentioned above, the download is sizable. Figure D: Once you've run the Access Utility, beta updates should appear on the Software Update screen.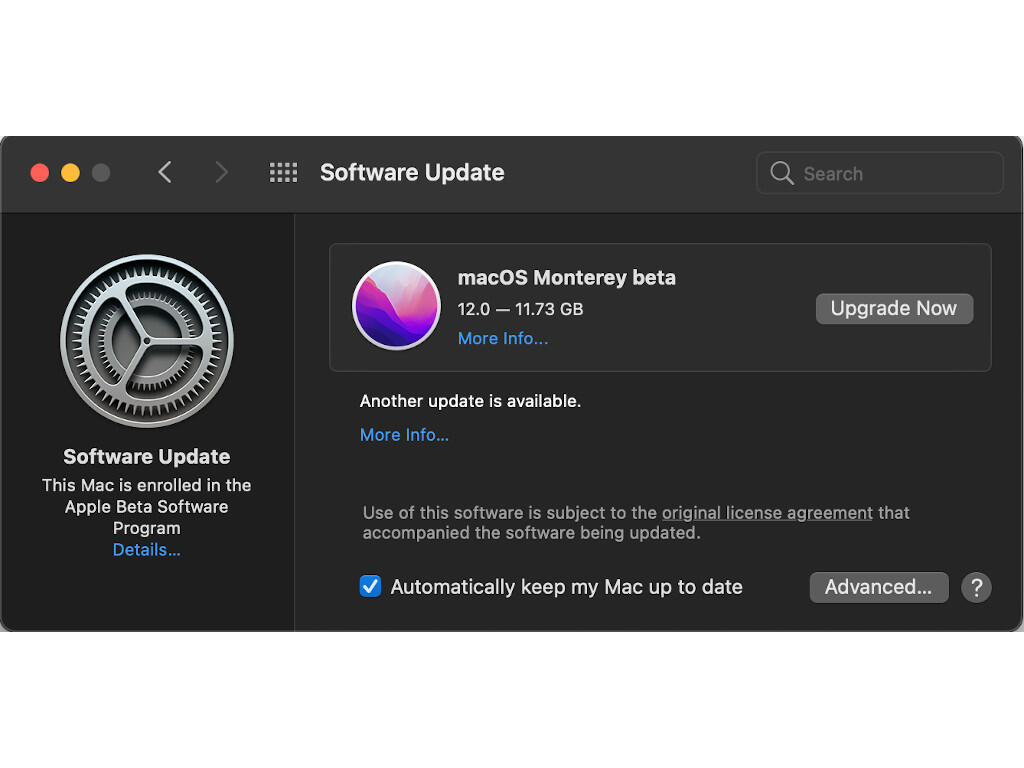
When complete, the Install macOS Monterey Beta application will open (Figure E). Note that you'll need to have about 9.5 GB free, on top of the 11.73 GB needed for the download, to install the beta. Click continue, and get ready to wait again: The install utility reports it will take about an hour to complete, which I can testify to being relatively accurate on my 2018 MacBook Air. Figure E: The macOS Monterey beta install application.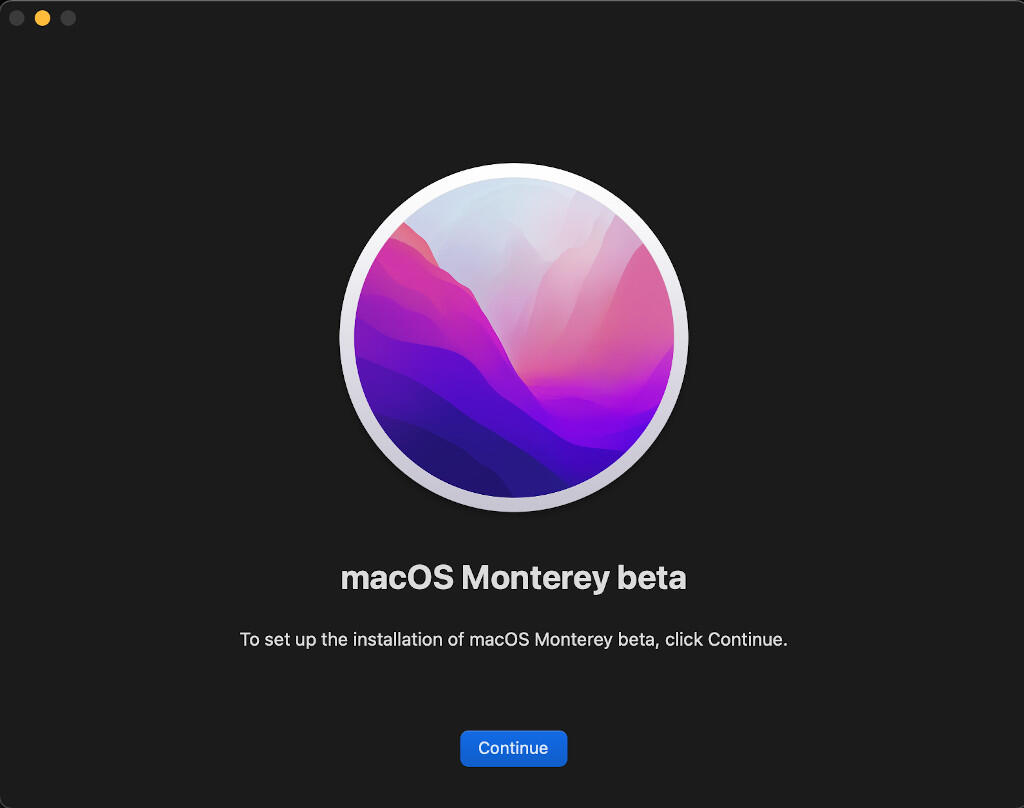
When complete, the application will prompt you to reboot (Figure F). Click Restart, let your Mac do its business, and that's it: You're ready to start using the macOS Monterey public beta. Figure F: You should see this screen prompting a restart once the installation of Monterey has completed.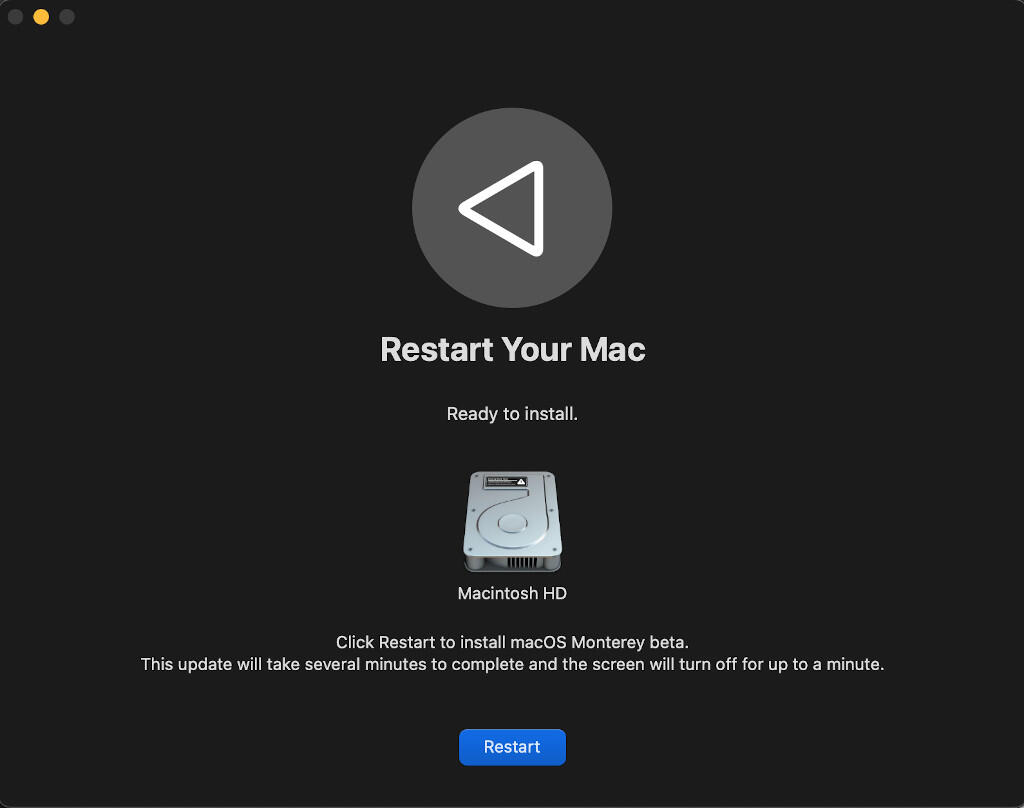
How to unenroll your Mac from the Apple Beta Program
There are a number of reasons you might want to get out of the public beta program: Bugs, too many updates to install or the general release of Monterey makes you want to stop getting updates until the next big release.
SEE: The future of work: Tools and strategies for the digital workplace (free PDF) (TechRepublic)
Whatever the reason, getting your Mac out of the beta channel is simple. Open Settings, click on Software Update, and look on the left of the window, where you should see "This Mac is enrolled in the Apple Beta Software Program," with "Details…" in blue below it. Click on that and you'll see the screen shown in Figure G. Figure G: Removing your Mac from the macOS beta update channel.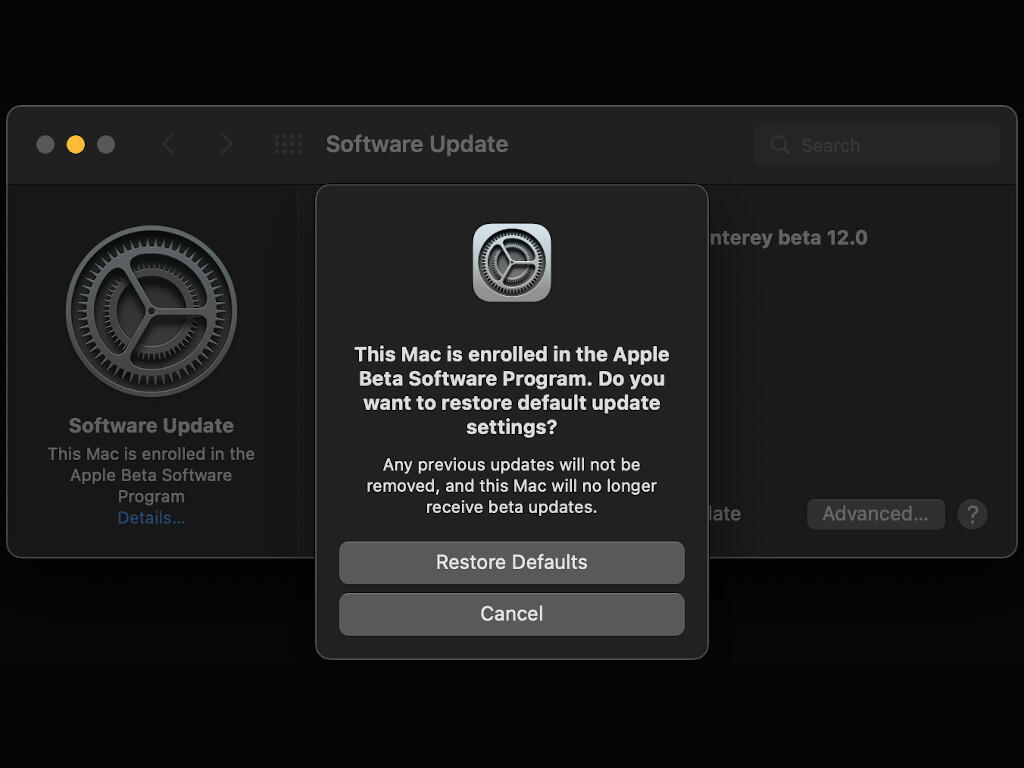
As Figure G says, clicking Restore Defaults will stop you from getting future beta updates. It doesn't remove currently installed betas, however; you'll need a Time Machine backup for that. If there's a general macOS release that's newer than the current beta you have installed you should get that update, putting you back in line with the rest of the non-beta user base.
Also see
- How to become a software engineer: A cheat sheet (TechRepublic)
- 5 programming languages application solutions developers should learn (free PDF) (TechRepublic)
- The best programming languages to learn--and the worst (TechRepublic Premium)
- Microsoft 365 (formerly Office 365) for business: Everything you need to know (ZDNet)
- Must-read coverage: Programming languages and developer career resources (TechRepublic on Flipboard)
What's Your Reaction?


.jpg)
.jpg)